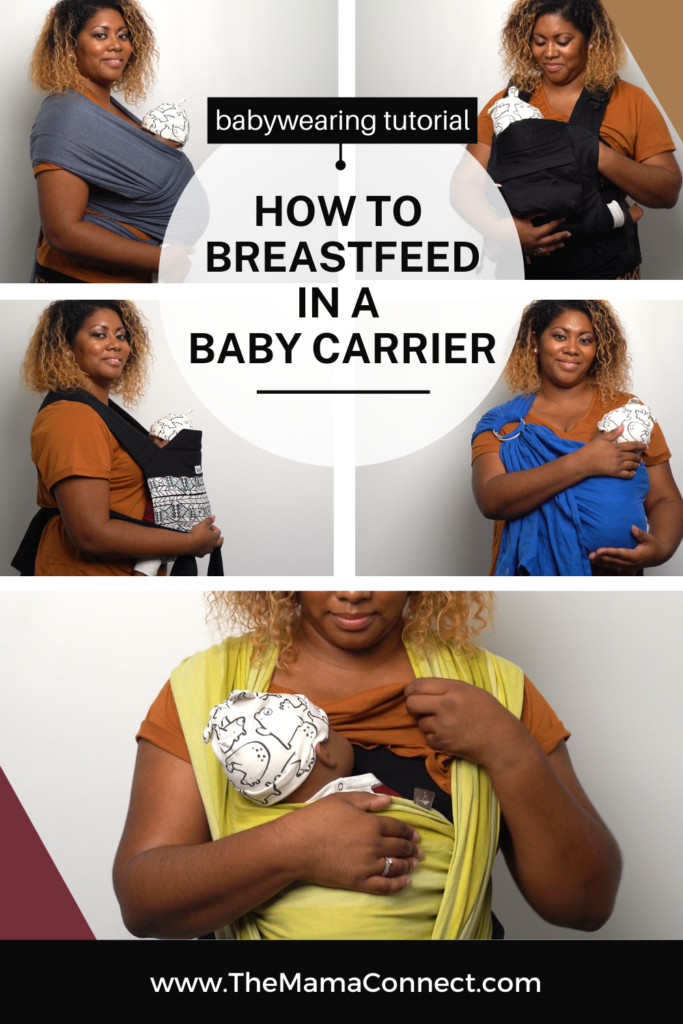
How To Breastfeed in a Baby Carrier
Do you want to learn how to breastfeed your baby “hands-free”? Are you ready to take your babywearing skills up to the next level? In this tutorial, I will show you how to breastfeed in a baby carrier, so be sure to read to the end.
Recently on the YouTube channel, I did a video tutorial demonstrating how to breastfeed in 5 different types of baby carriers. I’ll review them with you here! Breastfeeding while babywearing can make life so convenient. You’re able to feed your little one and take care of things inside your home or venture outside to go shopping or on a trip all at the same time! So, let’s jump on in!
Breastfeeding in a Ring Sling


The first thing you will need to do is loosen the ring sling with a slight “peeling back” motion of the top or outer ring. You can then work your baby down to breast level, peeling back that top ring as needed, and latch on your baby. If the tail is long enough, it can be used to provide coverage, if you so desire it, just as long as you can always see your baby’s face. Your baby should be actively nursing while in a baby carrier — this is IMPORTANT. No sleeping babies in the breastfeeding position. If your baby is no longer actively breastfeeding, return them back to an upright position, double-checking that their seat is nice and wide, and bringing all the slack or extra fabric back over to the rings for tightening, all for baby’s optimal positioning and safety.
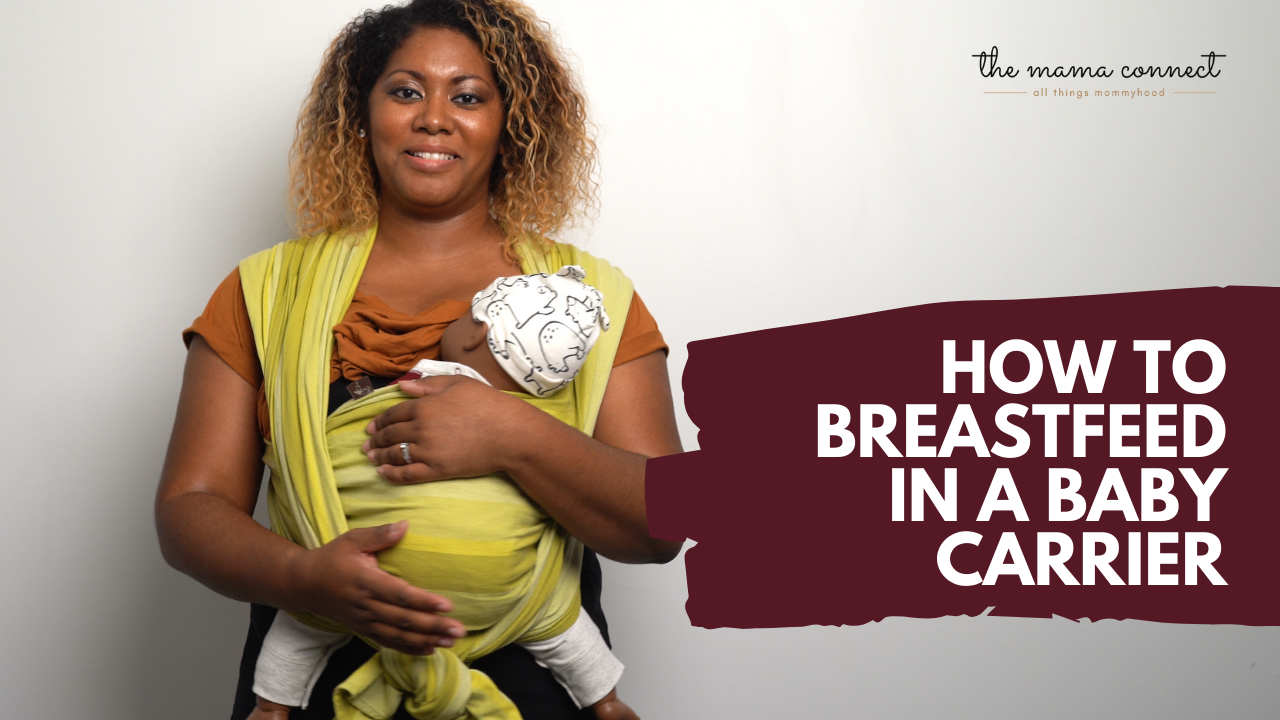
Breastfeeding in a Woven Wrap


With a woven wrap, you will first need to loosen the knot, creating some slack, and then retie the knot a little lower. Then you can guide your baby down towards that knot and towards the breast to be latched on. In this photo, I am using the 2-shirt hack, where your top shirt ultimately acts as a cover for your breasts, and your bottom shirt acts as a cover for your torso. You can, however, choose to simply do whatever method is easiest and most comfortable to you for accessing your breast because… there’s no right or wrong way of feeding your baby! Just remember, when your baby is no longer actively nursing, return them back to an upright position, making any necessary adjustments to their seat and getting rid of any slack by guiding the excess fabric back over to the knot and reknotting.
Breastfeeding in a Stretchy Wrap


Similarly to a woven wrap, you will first need to loosen the knot, creating some slack, and then retie the knot a little lower. And I do mean a little! As their name suggests, these wraps are quite stretchy. As with all of these carriers, you need to keep a hand on your baby while you’re making adjustments to the carrier or changing baby’s position, but even more so with the stretchy wrap. After you’ve retightened the knot, you can guide your baby down towards it and towards the breast to be latched on, making any necessary adjustments to the shoulder fabric or seat for comfort.
I’m sure you know what the next step is! Yes! Return baby back to an upright, wide seated position if they are no longer actively breastfeeding — meaning they have either fallen asleep or just are hanging out, no longer having a sucking and swallowing pattern. Then guide any excess fabric over to the knot and tightly reknot it.
[Click here to subscribe to The Mama Connect’s YouTube channel. Trust me, you don’t wanna miss the Mommyhood Scoop!]


Now, as a Babywearing Consultant and Educator, I personally prefer for my clients to breastfeed OUT of the stretchy wrap. So I will show you how to do that here. Simply peel away each layer and guide baby up and out. From here you can breastfeed however you normally would or prefer, as you would without your wrap. And the reason I prefer this suggestion is that it can be challenging, and even time consuming, to reset a stretchy wrap prior to and then after nursing. It’s not impossible to do, which is why I show you how, but if you’ve practiced and still can’t quite get the security and comfort you need, or you simply don’t have the time, just know that you have options!
Breastfeeding in a Meh-Dai / Bei-Dai


In this style of carrier, the first thing you need to do is loosen things up by untying the knot that was created by the top straps, creating a little slack, and then tightly tying a new knot a little further down. Be sure NOT to confuse the knot that was created with the top straps with the one created with your waist straps — trust me, it happens. Next, guide your baby down in the carrier to breast level and latch them on. When your baby has finished nursing and is no longer actively feeding, bring them back up to a kissable level, readjusting their seat, and getting rid of any slack by bringing the excess strap fabric to the knot. Then tightly retie your knot and you’re done.
Breastfeeding in a soft-structured carrier


Last, but not least, is the soft-structured carrier. Once again, the idea here is to loosen the carrier enough to guide your baby down into an upright breastfeeding position, while maintaining comfort and security. This can be achieved by releasing some of the webbing on the carrier, usually by lifting up the shoulder strap buckles, a little bit at a time on each side. Then, guide your baby down to the breast and latch them on! If your soft-structured carrier comes with a hood, you could attach it for extra coverage, if you so desire it. When your baby is no longer actively breastfeeding, return them back to an upright, kissable position, being sure to make seat adjustments as needed and retightening the webbing.
No matter which baby carrier you want to use, please understand that both breastfeeding and babywearing are two different skills. Before you try any of these tips, it’s important that you feel confident in your babywearing skills AND that breastfeeding is well-established.
If you like this post, click this picture to pin it for later!